How to use Little Space
Write a note. Keep it within reach. Come back here whenever you need help with a feature.
Start here
- Drag Little Space into Applications, then open it. No activation code or license file is needed.
- Point at a coloured tab on the edge of your Mac’s screen. Its sticky opens.
- Click inside the sticky and start writing. Your changes save automatically.
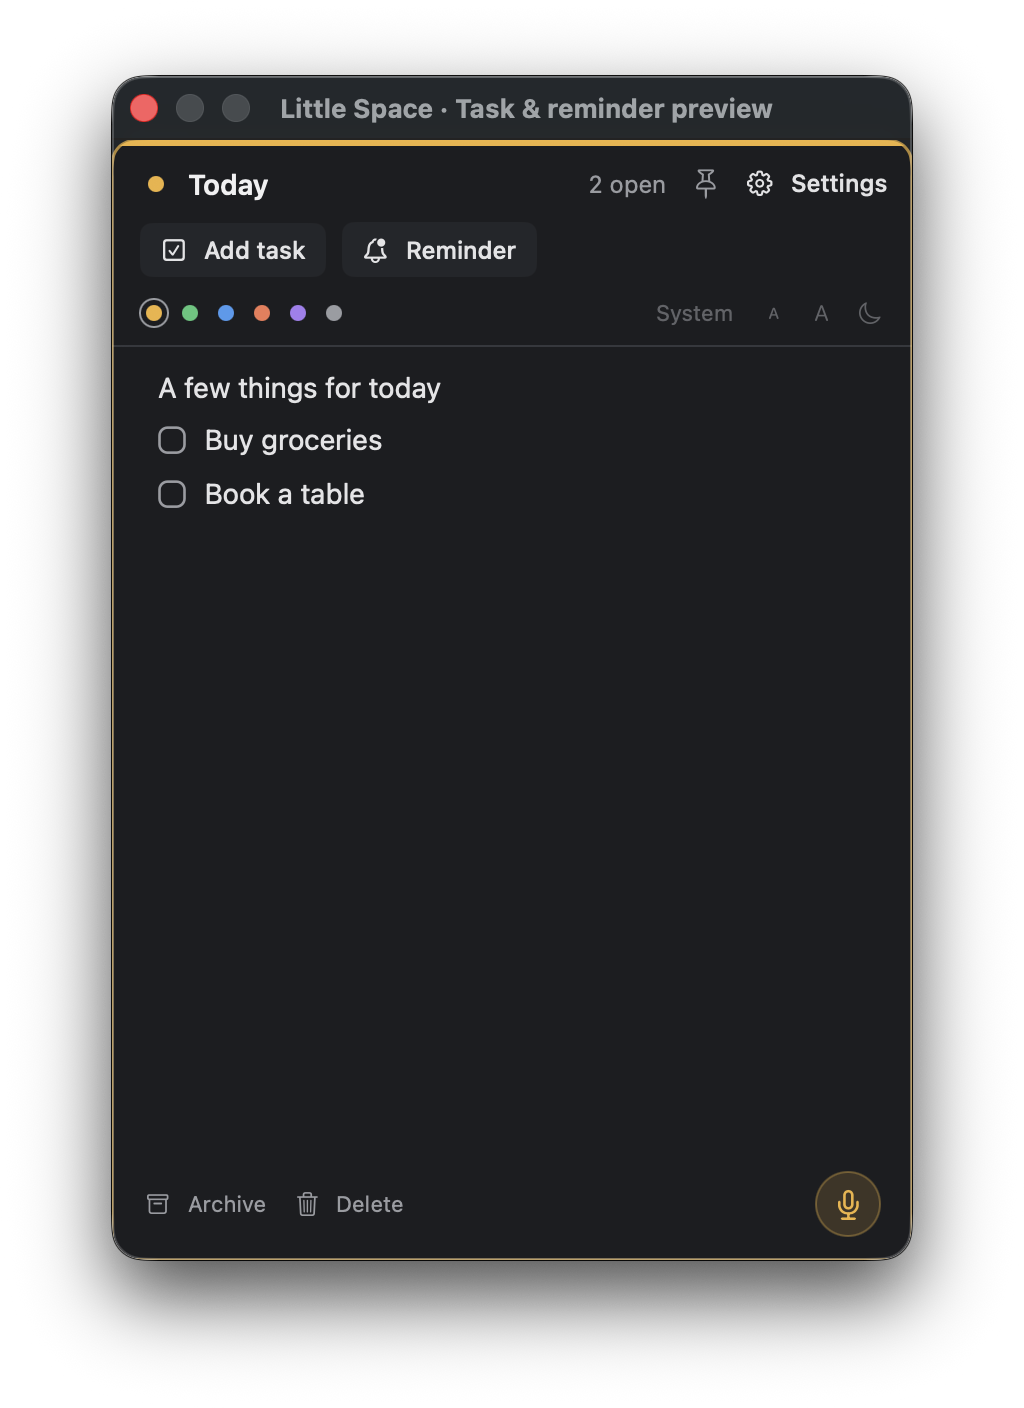
You don’t need to set everything up first. Start with one note. Add task and Reminder are beneath its title. The Settings button is beside the title.
Writing notes
Click anywhere inside an open sticky to place the cursor. Write plain notes, paste text or add links. Links become clickable.
- Rename: double-click the sticky’s name and type the new name. Press Enter to finish. A pencil appears when you hover over the title.
- Add another sticky: use the + beneath the coloured tabs, or New sticky in the menu bar.
- Close the preview: move away from an unpinned sticky. You can also press Escape while writing.
Closing a sticky hides it. It does not delete your writing.
Tasks & checklists
- Click Add task beneath the sticky’s title.
- A checkbox appears, with the cursor ready for your task.
- Press Enter to add the next task.
- Press Enter on an empty task to go back to normal writing.
Click a checkbox to mark the task done. Click it again to undo the tick. Use Clear completed at the bottom of the sticky when you want to remove ticked tasks.
Optional typing shortcut
At the start of a line, type [] followed by a space to make a checkbox. You can always use the button instead.
Reminders
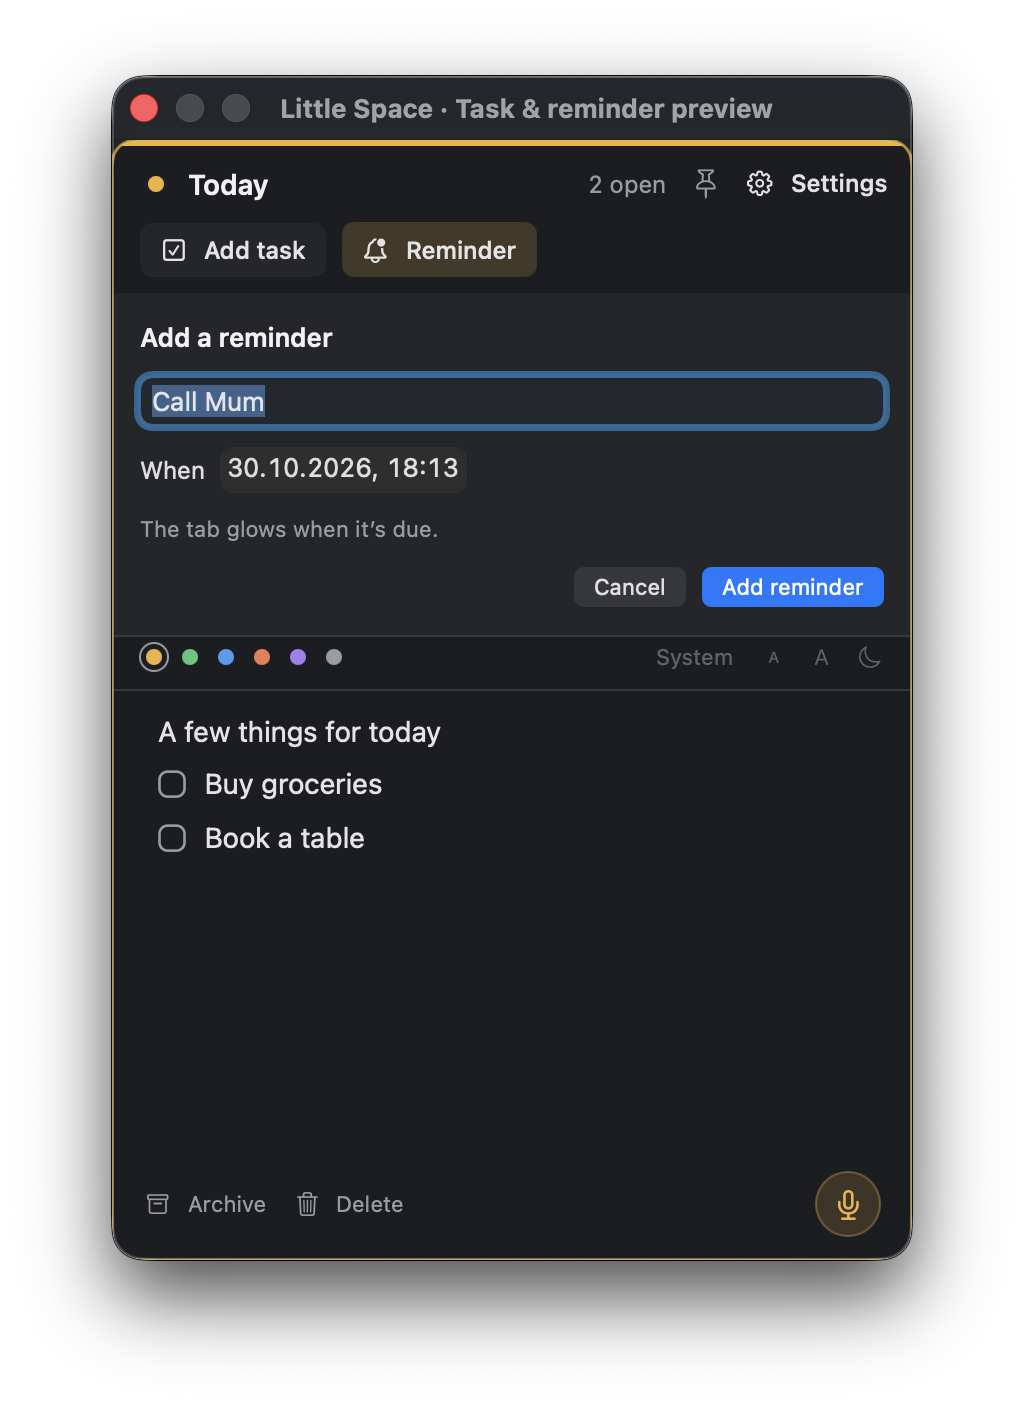
- Click Reminder beneath the sticky’s title.
- Enter what you need to do.
- Choose a date and time, then click Add reminder.
If you were writing in a line before opening the picker, that line is used as the starting point. Otherwise, Little Space adds a new task. Cancel closes the picker without adding a reminder.
What happens when it’s due?
The sticky’s coloured tab glows and gently moves to catch your attention. Tick the task when it’s done.
This is a visual reminder in Little Space. It does not schedule a macOS or iPhone notification. Keep the Mac app running to see its reminder.
Dates written in tasks
You can also write a date and time in a checkbox task, such as Call Mum tomorrow at 5pm. Date recognition depends on the phrase and your Mac’s language settings. A plain note without a checkbox does not become a task automatically.
A typed day without a time, such as “tomorrow”, is treated as an all-day task. It becomes overdue the following morning if it is still unticked. Use the picker when you want a particular time.
Text & appearance
Select text in the writing area. A small formatting toolbar appears beside the selection, with bold, italics and left/centre/right alignment. Click a control without leaving your writing. You can also right-click and choose Format.
| Action | Shortcut |
|---|---|
| Bold | ⌘ B |
| Italics | ⌘ I |
| Bigger text while writing | ⌘ + |
| Smaller text while writing | ⌘ − |
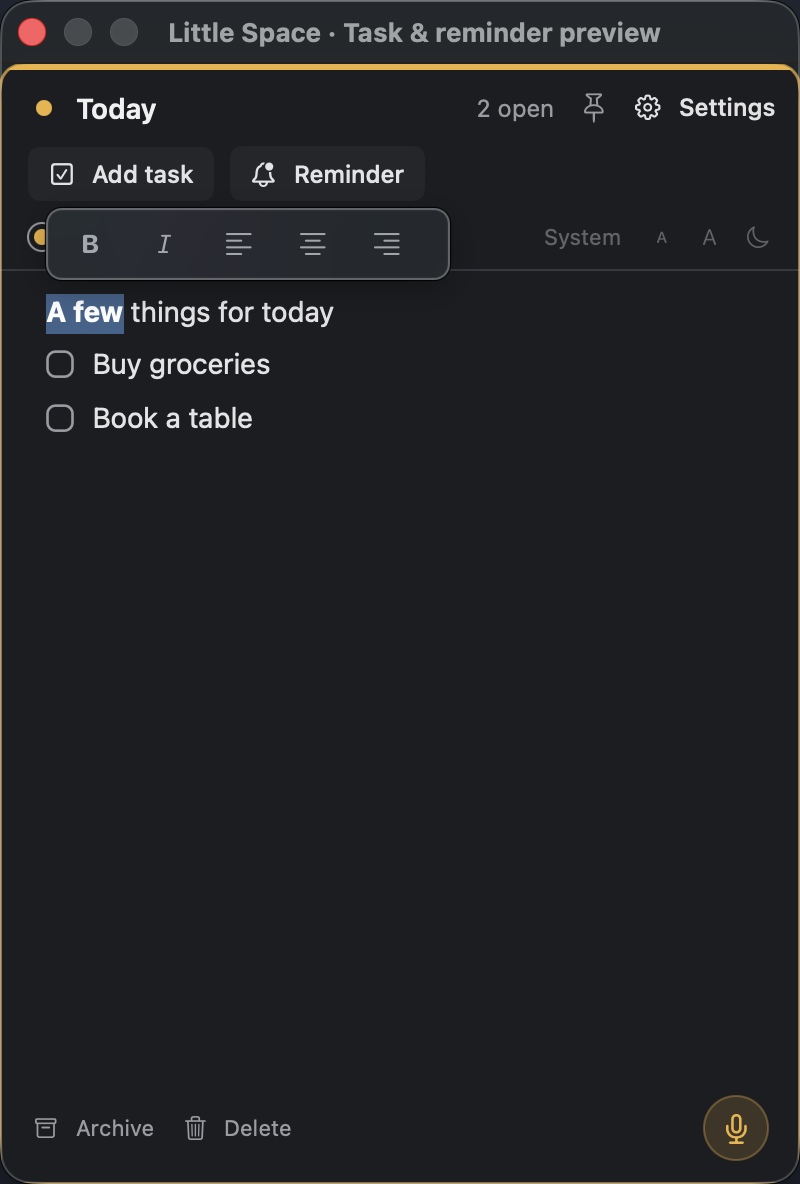
Use the coloured dots to change the sticky’s colour. The font, text size and light/dark controls sit beneath the action buttons. Font and size preferences apply across your stickies. Text formatting is saved with the note.
Pasted text arrives as plain text, using Little Space’s current writing style.
Voice notes
Click the microphone at the bottom of a sticky and speak. Your words are added as text. Click again to stop, or let the app finish after a pause.
For voice capture while working in another app, open Settings → Voice and choose a shortcut. Hold it while speaking, then release it. Voice capture uses your designated Quick sticky.
Start a spoken line with “to do” to make it a checkbox task. For example, “To do, buy groceries.”
Voice processing runs on your Mac. Allow microphone and speech access if macOS asks. A language may need an initial download from Apple; availability depends on your language and macOS version. Choose the language in Voice settings.
Moving & pinning
Move to the other screen edge
Drag a coloured tab away from the edge. The group follows your pointer. Drop it past the middle of the screen to move to the other side; drop it before the middle to return it to the original edge.
Reorder your stickies
Use a small up or down drag near the edge to change a tab’s position. You can also change the side, vertical position and display in Settings → General.
Keep a sticky open
Click the pin beside its title. It stays open when you move the pointer away. Click the pin again to let it tuck away.
Hide everything
Choose Hide stickies in the Little Space menu bar menu. Use the same menu to show them again. You can set a shortcut in General settings.
Search & archive
Search finds text and names in both active and archived notes. Click Settings beside the sticky’s title. In the central window, the Notes group contains Search notes and Archived. These are separate from app preferences. Both are also available from the menu bar.
Click Archive at the bottom of a sticky to take it off the edge while keeping its writing. Open Archived in the central window and choose Put back to restore it. The last active sticky cannot be archived. When sync is on, archiving removes the linked Apple Notes copy; the writing remains in Little Space’s archive.
Click Delete at the bottom of the sticky. A confirmation asks before the sticky and its contents are removed. When sync is enabled, deleting a linked sticky also removes its Apple Notes copy. Use Archive if you want to keep the note.
Sync with your iPhone
Little Space is a Mac app. There is no separate Little Space iPhone app. Your stickies appear in the Little Space folder inside Apple Notes on your iPhone.
- Enable Notes in iCloud settings on your Mac and iPhone.
- Use the same Apple Account for those notes on both devices.
- On your Mac, select that account as the default in Apple Notes settings.
- Click Settings beside any sticky’s title, then choose iPhone sync in the sidebar. Turn on Sync text with Apple Notes once and allow access to Notes if macOS asks.
- On your iPhone, open Apple Notes → Folders → iCloud → Little Space.
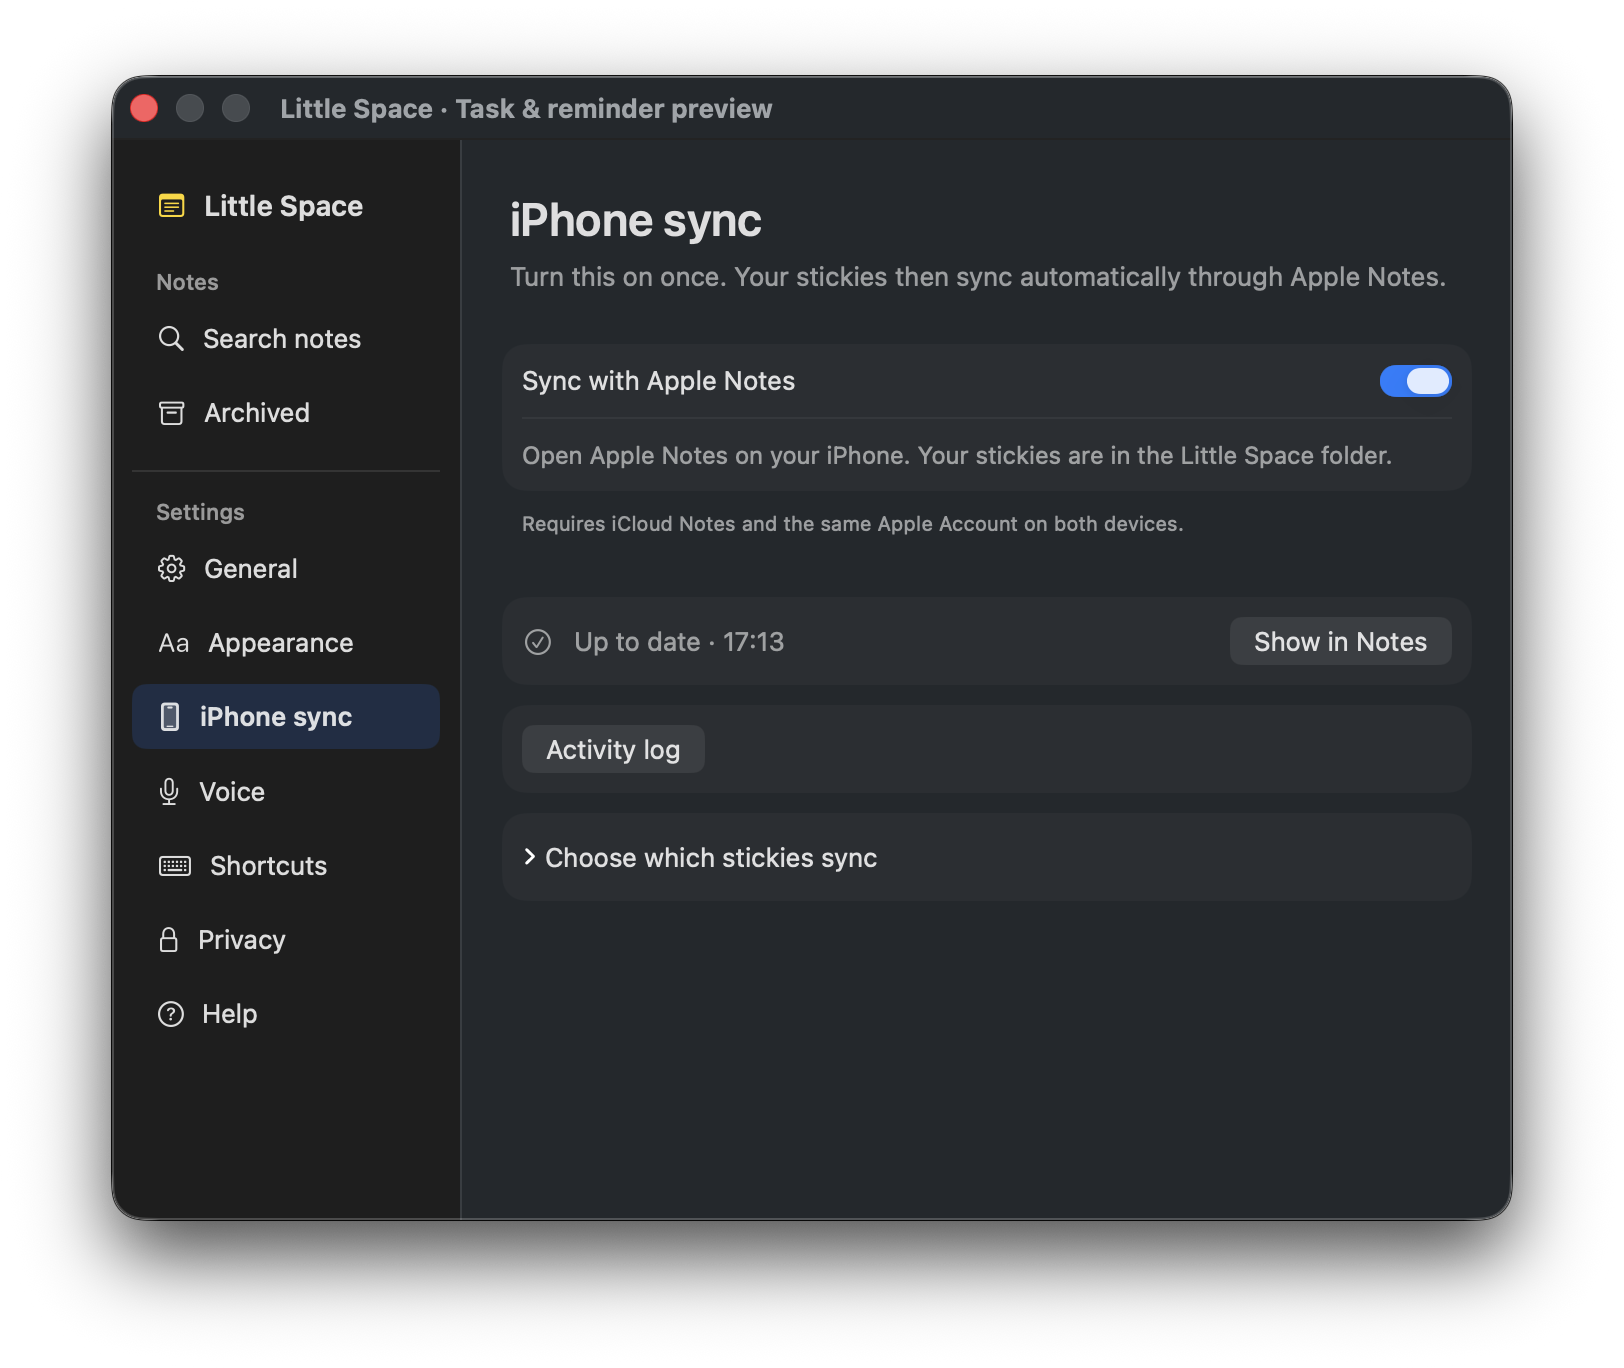
Turn this on once. Your stickies then sync automatically through Apple Notes. You do not need to click a sync button after each edit.
Text syncs both ways
Edit the text of a linked note in Apple Notes and Little Space brings the change into its sticky. A new text note in the Little Space folder becomes a sticky. Little Space only reads and changes its own folder.
Checklist limitation
Tasks created in Little Space appear on iPhone as ☐ / ☑ text symbols. You can read their status, but cannot tap those symbols to complete tasks in Apple Notes. Complete tasks in Little Space on your Mac.
Native Apple Notes lists are not supported. This includes Apple’s tappable checklists and ordinary bullet or numbered lists. Sync pauses for the entire affected note to protect its formatting. An existing sticky keeps its Mac content; a new Apple Notes note containing a native list stays in Apple Notes rather than becoming a sticky. Other text notes continue syncing.
Up to date in sync settings means Little Space has copied to Apple Notes on the Mac. iCloud then delivers those changes to your phone. It does not confirm that the phone has already received them.
If something hasn’t arrived
- Check that both devices have an internet connection and that the change appears in Apple Notes on the Mac.
- If it is missing there, check iCloud Notes, the Apple Account and available iCloud storage.
- If it is already in Mac Notes, open the sticky and allow a short time for Little Space to check it.
- If a warning appears beside the sticky’s title, open Settings → iPhone sync. Use Activity log to see recent sync activity.
Notes under On My Mac stay on your Mac. Separate work and personal Apple Accounts do not automatically sync with each other. Apple’s iCloud Notes setup guide ↗
Keep one sticky local
In Settings → iPhone sync, expand Choose which stickies sync and untick the sticky. This stops further syncing for it. An existing Apple Notes copy is not automatically removed. Other eligible stickies can keep syncing.
If both copies changed
A warning beside the title lets you choose the Mac version, the Apple Notes version, or keep both. Keep both when you need to review the differences before deciding.
Settings & shortcuts
Click the labelled Settings button beside any sticky’s title, or choose Settings from the menu bar. The Notes group contains Search notes and Archived. The Settings group holds your app preferences.
- General: screen edge, position, display, open-at-edge behavior and your opening, search and hiding shortcuts.
- Open at login: optional. Turn it on if you want Little Space to start when you sign in. Move the app into Applications first. macOS may require approval under System Settings → General → Login Items.
- Appearance: writing font, text size and light/dark look.
- Voice: capture shortcut and recognition language.
- Shortcuts: opening a sticky, search, hiding everything and voice capture.
- iPhone: optional Apple Notes sync and its activity log.
- Privacy: hide stickies from supported screen-sharing and recording capture.
- Help: the full guide and email support.
Click a shortcut field, then press the keys you want. Escape cancels shortcut editing; Delete clears the shortcut. If a shortcut cannot be registered, choose another combination.
Saving & privacy
Your notes save automatically into Little Space’s encrypted storage on your Mac. The encryption key is kept in your Mac’s Keychain. There is no separate Save button.
When updating, quit Little Space and replace the app in Applications. Keep its app data so your notes remain available. A purchase or giveaway download needs no activation code.
Optional iPhone sync adds a copy in Apple Notes and the selected iCloud account. Voice is processed on your Mac. The activity log records sync actions and error codes, not the words in your notes.
If the app says it cannot unlock your notes, reopen it and allow access to the Little Space key when macOS asks. Do not delete your notes or Keychain item to try to fix it. Contact support if you need help.
Still need a hand?
Email hello@littlespace.pro. Tell us what you tried, what you expected and what happened instead. Include your macOS and Little Space versions.
For a sync issue, mention whether the change already appears in Apple Notes on the Mac. Please remove private note text from any screenshots you share.